![]()
Barcode
Insert Barcodes in the Labels.
Barcode
|
|
|
Barcode |
|
Insert Barcodes in the Labels. |
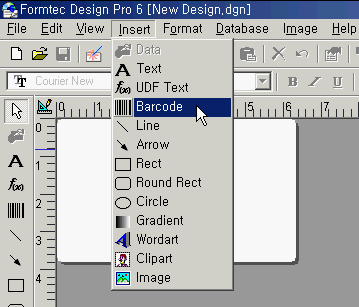
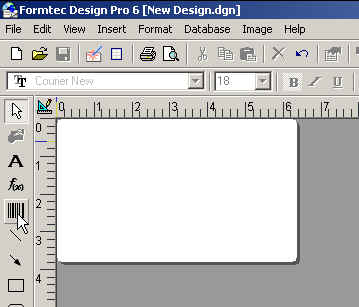
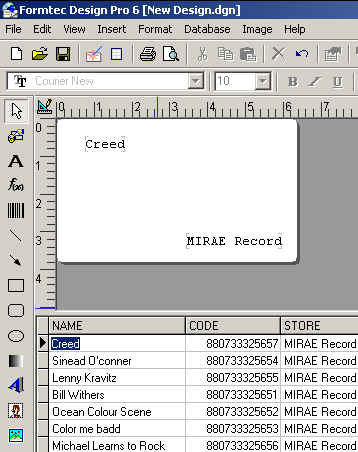
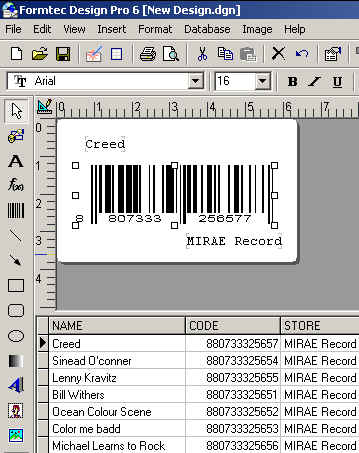
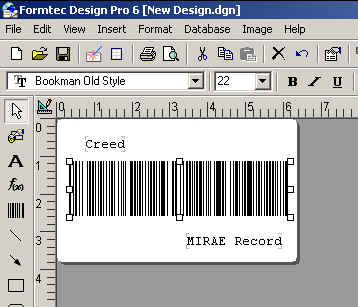
| 1. Select Insert > Barcode from the menu or click Barcode icon from drawing toolbar. Place the mouse pointer on the label and drag diagonally to a desirable size. Then Barcode Property window popup. You can select Barcode type and input contents, .
|
|
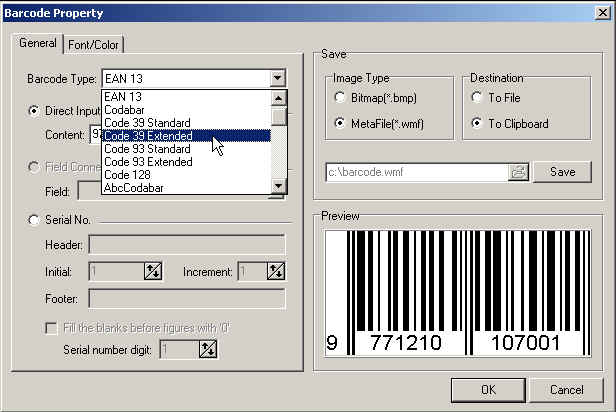
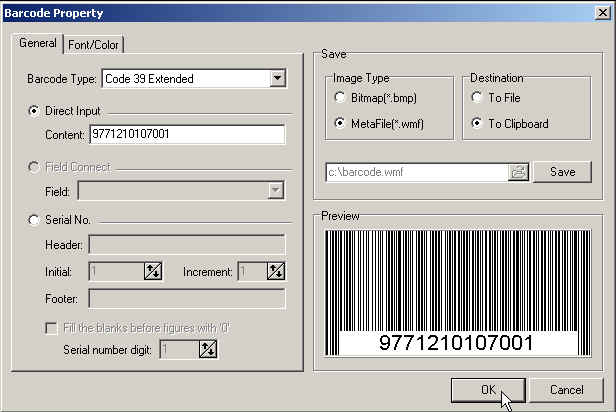
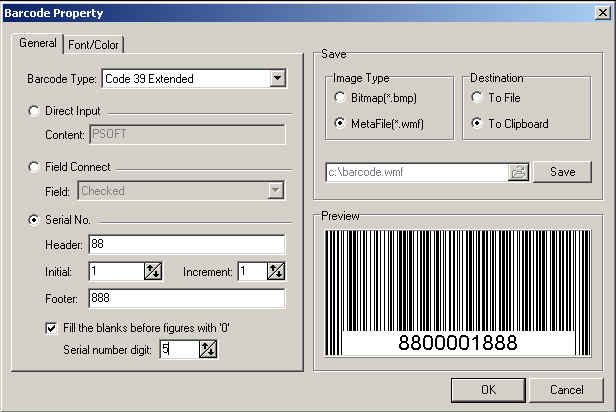
2. Barcode property consists of two taps ,General - Font&Color. In General Tap, select the type of the Barcode and input the text in Contents textbox. When inputing the text. The contents can be previewed, and Direct Input radiobox is used when printing multuple labels. Field Connect radiobox is used when different barcode in each label, and Input data file must be existed. |
|
2-1. Direct Input - Multiple Print outs of the same barcode.
|
|
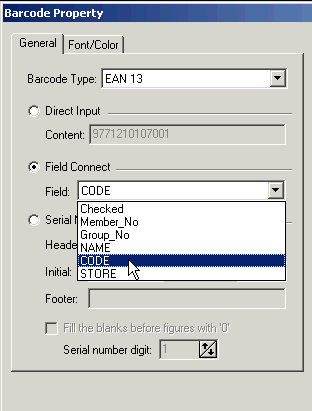
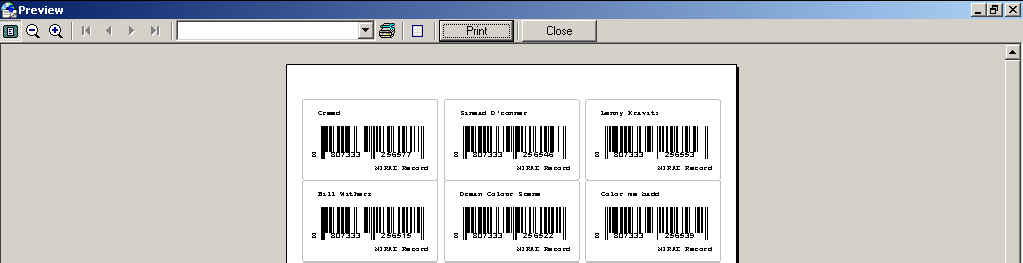
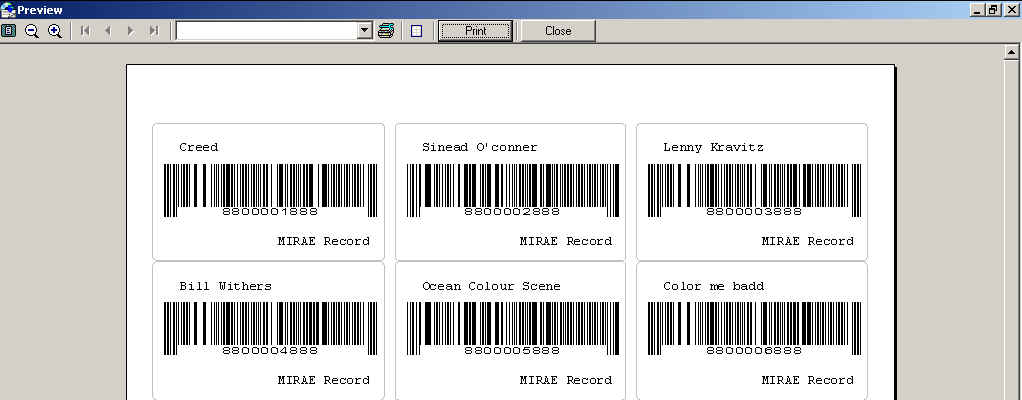
2-2. Field Connect - Print out different barcode per Label Select Menu > Database > Open and open a database file to start Barcoding. Select Barcode type and Filed to be connected, and Barcode is generated according to the field. When Barcode type is 39 and generating Barcodes with Name and Code of the product, select Field-Code from Barcode Property and Name as a field from Import Field in Field Property. Then Barcode and Product Name is generated according to the product Code.
|
|
2-3. Serial Number- Printout Barcodes as Serial number As in Field Connect, Open database by Database-Open and do Field Connect. Using Serial number feature, you can add header or footer according to a set of rules defined in the barcode type and a serial number for a barcode is generated by inputting initial value and increment. You can assign a certain number of digits by checking the Fill the blanks before figures with '0' box and setting up Serial number digit. The following Figure demonstrates an example set up, where Barcode type is Code 39 Extended, Header is 88, Footer 888, and the serial number has 5 digits.
|
|
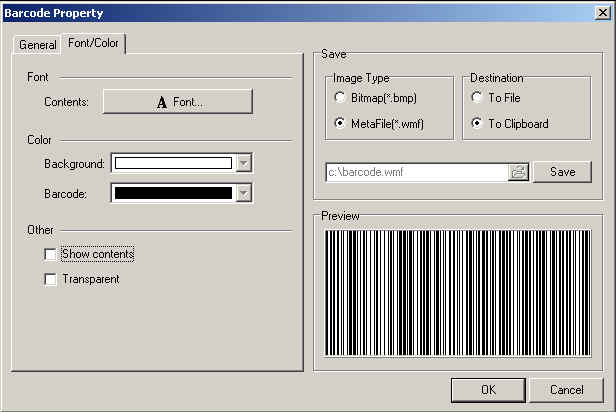
3. Select Font from Font/Color Tab. You can setup a Font from Font Property window.
|
|
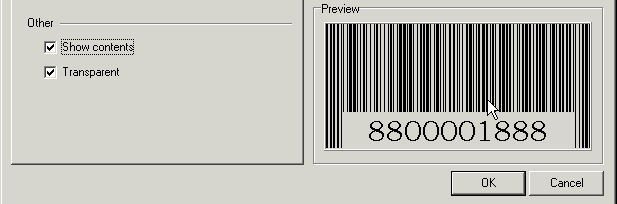
4. If you check the Show Contents checkbox, barcode is printed out along with the content, if unchecked only barcode is printed out. Barcode Number and contents can be inputted by connecting field or add text icon. |
|
5. If you check the Transparent box, the background is not printed out. |
|
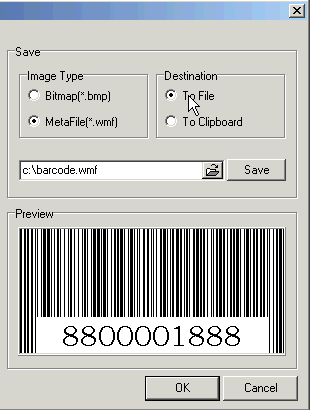
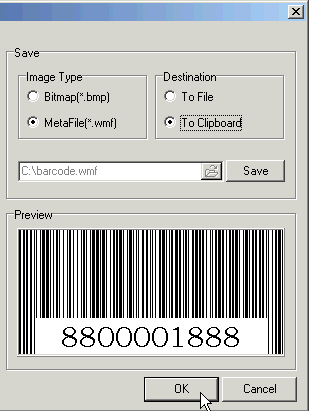
6. You can save the barcodes generated using Formtec Design Pro 6 as wmf or bmp files with Save option so that you can use the barcodes in other applications such as word processors. You can setup Destination as To File or To Clipboard. With To File, you can store the barcode in your computer for later use while with To Clipboard you can use it only once since it is stored as a temporary file . |
|
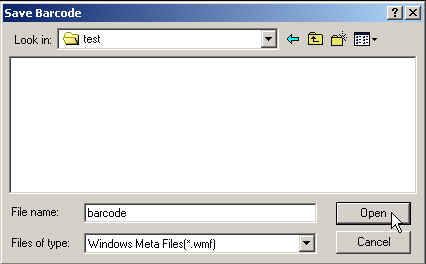
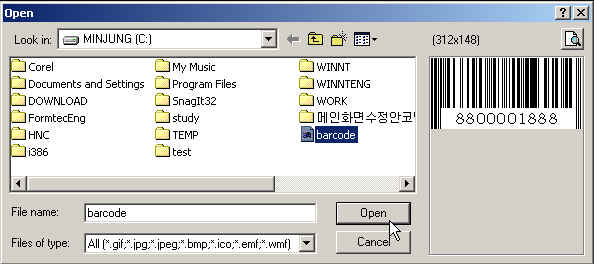
6-1. If you wish to save it as a file, select file type and type in the file name. If you wish to change the path, click the open icon to bring up the browser window. You can change the file name and directory path. Select Save from the barcode property window..
|
|
6-2. You can insert the barcode as a picture whenever necessary in other applications.
|
|
7. If you save the barcode to Clipboard, you can use it like a clipart or picture file in other applications.
|